First time baking a galette (or slab pie) and using figs! Can't wait to take a bite!
Showing posts with label I like food. Show all posts
Sunday, September 19, 2010
Tuesday, September 14, 2010
Sunday, August 1, 2010
Embracing my inner cabbage
I don't like coleslaw. I have tried it and can say that I have never met a coleslaw I like therefore, I gave up on trying to like coleslaw along time ago. A lot of it has to do with it being made with mayo which is another thing I will never like. (On the other hand, I do like potato salad which has mayo but more mustard than mayo ratio so it cancels out the mayo part). My mom made me eat too many mayo and cheese on white bread sandwiches that I have this crazy aversion to mayo now.
One time, my husband and I were enjoying lunch at Crater Lake Lodge when my entrée came with a side of coleslaw. My husband knows I don't like coleslaw but he insisted I try it. I made horrible awful face that the lodge manager noticed and came over to see if everything was ok. I explained my dislike for coleslaw and he came back with a side of green salad.
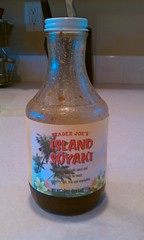
[caption id="" align="alignleft" width="143" caption="Trader Joe's Island Soyaki: good for a lot of things"]
[/caption]
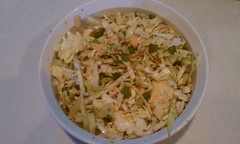
Fast forward five years and in my CSA basket I'm presented a head of cabbage. Last year, I gave cabbage away each time but my friend Linda wouldn't take the whole head. Instead she suggested that I make crunchy Chinese cabbage salad with my Trader Joe's Island Soyaki. This particular Soyaki I often use as a marinade and salad dressing (mandarin oranges tastes yummy with this sauce) . It's a staple in our house. I tell you, if we ever move, one of the requirements will be that there has to be a Trader Joe's in that city. I can't live without that place.
Time to improvise. I did a little research on google and came up with this fabulous recipe!
Shannon's Crunchy Chinese Cabbage Salad
1/2 head of Cabbage
2 green onions
1/2 cup toasted slivered almonds
1/2 cup Trader Joe's Island Soyaki
1 package chicken flavored ramen noodles
Chop the head of cabbage into thin strips.
Chop the green onions and combine with cabbage in a large bowl.
Add almonds and toss Trader Joe's Island Soyaki.
Right before serving, add one package of crushed up ramen noodles.
Enjoy!
[caption id="" align="aligncenter" width="240" caption="Crunchy Chinese Cabbage Salad"]
[/caption]
No mayonnaise was harmed in the making of this recipe!
One time, my husband and I were enjoying lunch at Crater Lake Lodge when my entrée came with a side of coleslaw. My husband knows I don't like coleslaw but he insisted I try it. I made horrible awful face that the lodge manager noticed and came over to see if everything was ok. I explained my dislike for coleslaw and he came back with a side of green salad.
[caption id="" align="alignleft" width="143" caption="Trader Joe's Island Soyaki: good for a lot of things"]
Fast forward five years and in my CSA basket I'm presented a head of cabbage. Last year, I gave cabbage away each time but my friend Linda wouldn't take the whole head. Instead she suggested that I make crunchy Chinese cabbage salad with my Trader Joe's Island Soyaki. This particular Soyaki I often use as a marinade and salad dressing (mandarin oranges tastes yummy with this sauce) . It's a staple in our house. I tell you, if we ever move, one of the requirements will be that there has to be a Trader Joe's in that city. I can't live without that place.
Time to improvise. I did a little research on google and came up with this fabulous recipe!
Shannon's Crunchy Chinese Cabbage Salad
1/2 head of Cabbage
2 green onions
1/2 cup toasted slivered almonds
1/2 cup Trader Joe's Island Soyaki
1 package chicken flavored ramen noodles
Chop the head of cabbage into thin strips.
Chop the green onions and combine with cabbage in a large bowl.
Add almonds and toss Trader Joe's Island Soyaki.
Right before serving, add one package of crushed up ramen noodles.
Enjoy!
[caption id="" align="aligncenter" width="240" caption="Crunchy Chinese Cabbage Salad"]
No mayonnaise was harmed in the making of this recipe!
Sunday, July 18, 2010
I’m in a pickle
[caption id="" align="alignleft" width="240" caption="pickling cucumbers"]
[/caption]
Last week I was sitting at a business meeting at a newly re-opened restaurant enjoying a veggie sandwich when I took a bite of what I thought was a dill pickle. My lunch companion noticed that I really didn't care for a bread and butter pickle cut up to look like a dill pickle.
"YUCK!" I said as I spit the pickle out. Not my finest moment but this gave me the opportunity to talk about my love of dill pickles, especially my Grandma's homemade pickles. My Grandma used to spend the summers canning veggies and sauce and making homemade jams. Each summer she'd make her famous dill pickles and they'd be all eaten up by the end of the week!
When I moved from Nebraska, I knew I would miss those pickles and fortunately for me, my 86 year old Grandma found an easy recipe I could make without too much fuss. She calls them "Polish Sun Dill Pickles." Yes, you read that right, SUN PICKLES.
First, get yourself a large glass jar ... like the one you use to make sun tea with. Now, when I bought my sun tea jar, my husband was puzzled ... "you don't drink tea?" My response, "SUN PICKLES." He scratched his head last summer when I told him and was a little worried about my state of mind.
Wash your pickling cucumbers and place them in a jar with half a head of garlic and 6 springs of dill. I don't usually measure how many pounds I buy as I usually take the sun tea jar with me and fill it up at the store and then put them in a baggy.
[caption id="" align="alignnone" width="299" caption="Yes, that is a sun tea jar full of pickles"]
[/caption]
Mix together water, vinegar, 1/2 cup of salt (I used kosher salt) and alum powder and pour over the cucumbers. Put in the sun for 48 hours. Yes, they are THAT EASY.
Now, when they are done, I put them in jars with the pickle juice and store in the frig. My Grandma was telling me that I don't need to put them in the refrigerator but I just do it to be on the safe side.
Enjoy!!!
Polish Sun Pickles
6 1/2 c. water
3 1/4 c. white vinegar
4-6 sprigs dill
1/2 c. salt
1/2 head of garlic
1 tsp. alum powder
Wash cubes and put in large sun tea jar. Mix above ingredients and put int0 jar. Set in sun for 2 days.
[caption id="" align="aligncenter" width="299" caption="Sun pickles chillin'"]
[/caption]
Last week I was sitting at a business meeting at a newly re-opened restaurant enjoying a veggie sandwich when I took a bite of what I thought was a dill pickle. My lunch companion noticed that I really didn't care for a bread and butter pickle cut up to look like a dill pickle.
"YUCK!" I said as I spit the pickle out. Not my finest moment but this gave me the opportunity to talk about my love of dill pickles, especially my Grandma's homemade pickles. My Grandma used to spend the summers canning veggies and sauce and making homemade jams. Each summer she'd make her famous dill pickles and they'd be all eaten up by the end of the week!
When I moved from Nebraska, I knew I would miss those pickles and fortunately for me, my 86 year old Grandma found an easy recipe I could make without too much fuss. She calls them "Polish Sun Dill Pickles." Yes, you read that right, SUN PICKLES.
First, get yourself a large glass jar ... like the one you use to make sun tea with. Now, when I bought my sun tea jar, my husband was puzzled ... "you don't drink tea?" My response, "SUN PICKLES." He scratched his head last summer when I told him and was a little worried about my state of mind.
Wash your pickling cucumbers and place them in a jar with half a head of garlic and 6 springs of dill. I don't usually measure how many pounds I buy as I usually take the sun tea jar with me and fill it up at the store and then put them in a baggy.
[caption id="" align="alignnone" width="299" caption="Yes, that is a sun tea jar full of pickles"]
Mix together water, vinegar, 1/2 cup of salt (I used kosher salt) and alum powder and pour over the cucumbers. Put in the sun for 48 hours. Yes, they are THAT EASY.
Now, when they are done, I put them in jars with the pickle juice and store in the frig. My Grandma was telling me that I don't need to put them in the refrigerator but I just do it to be on the safe side.
Enjoy!!!
Polish Sun Pickles
6 1/2 c. water
3 1/4 c. white vinegar
4-6 sprigs dill
1/2 c. salt
1/2 head of garlic
1 tsp. alum powder
Wash cubes and put in large sun tea jar. Mix above ingredients and put int0 jar. Set in sun for 2 days.
[caption id="" align="aligncenter" width="299" caption="Sun pickles chillin'"]
Sunday, May 2, 2010
Inspired to bake bread
This month, to get back in the blogging spirit, I want to write about those who inspire me. I've had this idea for a while in my head and I think just getting it down on paper will help.
[caption id="" align="alignleft" width="100" caption="Bread rising"]
[/caption]
My husband bought me a Kitchen Aid mixer for my birthday with the goal to start baking our own bread and stop buying from the grocery store. I have always wanted to do this but I was even more inspired by Lisa Smith, a fellow twitter/Ignite Bend friend. She gave an inspiring presentation at an AdBite Presentation, so inspiring, I had to get a Kitchen Aid. She makes bread for her family which was my goal. That way, I know what's in the bread and there isn't any yucky stuff in it.
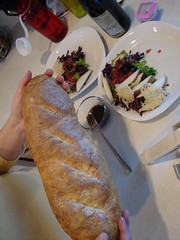
[caption id="" align="alignright" width="180" caption="French Bread take 2"]
[/caption]
So far I've made four loaves of white bread, two loaves of wheat bread, 2 French loaves and two loaves of honey oat whole wheat. What I learned from watching Lisa one morning at her house, is that I'm not kneading my bread enough in the mixer which may be why my first French Bread didn't "puff" up. On the second one, I kneaded twice as long and it turned out just about perfect but not as puffy as I had hoped for. I know that I could probably make the crust crustier by spraying with water but I just need to buy a water bottle first. Her biggest tip, do a windowpane test, something I have skipped a few times ... guess what, I won't be skipping this test anymore.
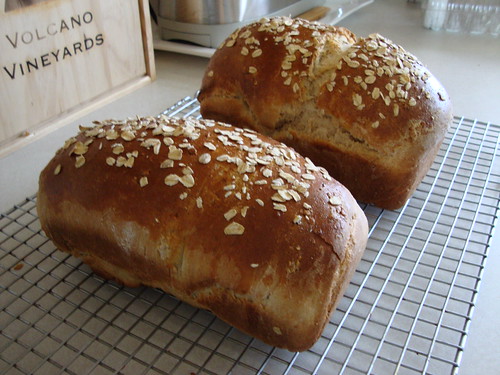
My favorite recipe so far? Honey Oatmeal Bread! I did make some modifications to the recipe because we try to mostly eat whole wheat bread in our house. I ended up replacing half the flour with whole wheat flour and omg, delicious! It makes the best sandwiches and just plain ole toast. Now I just wish I had a bread slicer, a flour shield for my mixer and a scale.
If you haven't given making your own bread a try, buying a Kitchen Aid is the best investment you can make, plus it won't have any of that yucky stuff in it! Here is the recipe I use (with modifications).
Honey Oatmeal Bread for Your Kitchen Aid Mixer by RecipeZaar.com
Makes 2 loaves of bread
Ingredients
5-6 1/2 cups all-purpose flour (use half white/half wheat)
1 cup quick-cooking oat
2 teaspoons salt
2 (1/4 ounce) packages active dry yeast
1 1/2 cups water
1/2 cup honey
1/2 cup butter or margarine
2 eggs
1 tablespoon water
1 egg white
Oatmeal
Directions
Place 5 cups flour, oats, salt, and yeast in Bowl.
Attach bowl and dough hook.
Turn to speed 2 and mix for 30 seconds.
In saucepan, combine water, honey, and butter.
Heat to 120°F to 130°F.
On Speed 2, slowly add warm liquids to flour mixture, mixing for about 1 minute.
Add eggs; mix an additional 1 minute.
Still on Speed 2, add remaining flour, 1/2 cup at a time, until dough clings to hook and cleans sides of bowl, about 3 minutes.
Knead on Speed 2 for 7-10 minutes or until dough is smooth and elastic.
Place in greased bowl, turning to grease top.
Cover; let rise in warm place, until doubled, about 1 hour.
Punch dough down.
Divide dough in half.
Shape each half into a loaf.
Place each loaf into a greased 8 1/2x 4 1/2 x 2 1/2-inch bread pan.
Cover; let rise in warm place till doubled, about an hour.
Combine 1 TBSP water and egg white. Brush tops of loaves with mixture.
Sprinkle with oatmeal.
Bake at 375°F for 40 minutes.
Remove from pans and cool on wire racks.
Thank you, Lisa for being an inspiration to me!
[caption id="" align="aligncenter" width="500" caption="Honey Oat Whole Wheat Bread"]
[/caption]
[caption id="" align="alignleft" width="100" caption="Bread rising"]
My husband bought me a Kitchen Aid mixer for my birthday with the goal to start baking our own bread and stop buying from the grocery store. I have always wanted to do this but I was even more inspired by Lisa Smith, a fellow twitter/Ignite Bend friend. She gave an inspiring presentation at an AdBite Presentation, so inspiring, I had to get a Kitchen Aid. She makes bread for her family which was my goal. That way, I know what's in the bread and there isn't any yucky stuff in it.
[caption id="" align="alignright" width="180" caption="French Bread take 2"]
So far I've made four loaves of white bread, two loaves of wheat bread, 2 French loaves and two loaves of honey oat whole wheat. What I learned from watching Lisa one morning at her house, is that I'm not kneading my bread enough in the mixer which may be why my first French Bread didn't "puff" up. On the second one, I kneaded twice as long and it turned out just about perfect but not as puffy as I had hoped for. I know that I could probably make the crust crustier by spraying with water but I just need to buy a water bottle first. Her biggest tip, do a windowpane test, something I have skipped a few times ... guess what, I won't be skipping this test anymore.
My favorite recipe so far? Honey Oatmeal Bread! I did make some modifications to the recipe because we try to mostly eat whole wheat bread in our house. I ended up replacing half the flour with whole wheat flour and omg, delicious! It makes the best sandwiches and just plain ole toast. Now I just wish I had a bread slicer, a flour shield for my mixer and a scale.
If you haven't given making your own bread a try, buying a Kitchen Aid is the best investment you can make, plus it won't have any of that yucky stuff in it! Here is the recipe I use (with modifications).
Honey Oatmeal Bread for Your Kitchen Aid Mixer by RecipeZaar.com
Makes 2 loaves of bread
Ingredients
5-6 1/2 cups all-purpose flour (use half white/half wheat)
1 cup quick-cooking oat
2 teaspoons salt
2 (1/4 ounce) packages active dry yeast
1 1/2 cups water
1/2 cup honey
1/2 cup butter or margarine
2 eggs
1 tablespoon water
1 egg white
Oatmeal
Directions
Place 5 cups flour, oats, salt, and yeast in Bowl.
Attach bowl and dough hook.
Turn to speed 2 and mix for 30 seconds.
In saucepan, combine water, honey, and butter.
Heat to 120°F to 130°F.
On Speed 2, slowly add warm liquids to flour mixture, mixing for about 1 minute.
Add eggs; mix an additional 1 minute.
Still on Speed 2, add remaining flour, 1/2 cup at a time, until dough clings to hook and cleans sides of bowl, about 3 minutes.
Knead on Speed 2 for 7-10 minutes or until dough is smooth and elastic.
Place in greased bowl, turning to grease top.
Cover; let rise in warm place, until doubled, about 1 hour.
Punch dough down.
Divide dough in half.
Shape each half into a loaf.
Place each loaf into a greased 8 1/2x 4 1/2 x 2 1/2-inch bread pan.
Cover; let rise in warm place till doubled, about an hour.
Combine 1 TBSP water and egg white. Brush tops of loaves with mixture.
Sprinkle with oatmeal.
Bake at 375°F for 40 minutes.
Remove from pans and cool on wire racks.
Thank you, Lisa for being an inspiration to me!
[caption id="" align="aligncenter" width="500" caption="Honey Oat Whole Wheat Bread"]
Sunday, January 31, 2010
Baking bread
[caption id="" align="alignleft" width="280" caption="Look what I got for my birthday"]
[/caption]
For my birthday, my husband got me a KitchenAid Mixer. This is something I have wanted for a really, really long time. I didn't register for it because it was so expensive. Instead, I registered for a cheaper mixer that quite wasn't doing the job in the mixing department. When I saw that Costco had the mixer I wanted for $50 off, I begged and begged and swore I would make bread from scratch and never buy a loaf again. Brian said I didn't have to make bread from scratch but I had to use it.
Today, I christened my mixer and boy am I in love! I've been dying to make and bake homemade bread but I didn't want to knead the dough for 10 minutes. ICK! I must say that I was truly inspired by former Bendite, Anna Sowa, who wrote a whole blog post about baking bread and how cheap and easy it was with her new KitchenAid Mixer.
I started off my bread baking with the white sandwich bread recipe
[caption id="" align="alignright" width="300" caption="My first loaves rising"]
[/caption]
that comes with the mixer which was pretty straight forward. Do I really have to put sugar in it? I almost didn't add the sugar but I did, along with the little bit of salt. I mixed it up with the dough hook and let it rise for an hour. I kept checking and it kept growing and growing and growing. Then the directions said to divide, roll out and shape into loaves for the pans then cover for another hour while they rise some more. I checked a few times and it was growing and growing in size. I squealed with delight. Woo hoo. I baked it in the oven for 30 mins on 400 degrees and PRESTO ... we had classic white bread!
So what did I make with it? I made my husband a grilled cheese sandwich and then my son a pb&j (which he didn't eat). I took a taste of both and was in HEAVEN!
[caption id="" align="aligncenter" width="500" caption="I made bread!"]
[/caption]
I can't wait to see what other adventures my new mixer brings me!
For my birthday, my husband got me a KitchenAid Mixer. This is something I have wanted for a really, really long time. I didn't register for it because it was so expensive. Instead, I registered for a cheaper mixer that quite wasn't doing the job in the mixing department. When I saw that Costco had the mixer I wanted for $50 off, I begged and begged and swore I would make bread from scratch and never buy a loaf again. Brian said I didn't have to make bread from scratch but I had to use it.
Today, I christened my mixer and boy am I in love! I've been dying to make and bake homemade bread but I didn't want to knead the dough for 10 minutes. ICK! I must say that I was truly inspired by former Bendite, Anna Sowa, who wrote a whole blog post about baking bread and how cheap and easy it was with her new KitchenAid Mixer.
I started off my bread baking with the white sandwich bread recipe
[caption id="" align="alignright" width="300" caption="My first loaves rising"]
that comes with the mixer which was pretty straight forward. Do I really have to put sugar in it? I almost didn't add the sugar but I did, along with the little bit of salt. I mixed it up with the dough hook and let it rise for an hour. I kept checking and it kept growing and growing and growing. Then the directions said to divide, roll out and shape into loaves for the pans then cover for another hour while they rise some more. I checked a few times and it was growing and growing in size. I squealed with delight. Woo hoo. I baked it in the oven for 30 mins on 400 degrees and PRESTO ... we had classic white bread!
So what did I make with it? I made my husband a grilled cheese sandwich and then my son a pb&j (which he didn't eat). I took a taste of both and was in HEAVEN!
[caption id="" align="aligncenter" width="500" caption="I made bread!"]
I can't wait to see what other adventures my new mixer brings me!
Thursday, January 14, 2010
The hand still gives me the creeps
I divorced Hamburger Helper in 1997. As a poor college student who lived on her own, I ate a lot of hamburger helper, ramen noodles and often crashed my grandmother’s house for dinner (she lived down the street from me). One evening, I ate some Hamburger Helper while studying and then got violently ill. I threw up all night and missed work and school the next day. Horribly dehydrated, my aunt took me to the doctor (this was about a year after my mother died) where it was discovered I had E Coli poisoning. Though I’m pretty sure it was the meat that I got sick from, I swore off Hamburger Helper in any way, shape or form.
Fast forward to being married 10 years later – my husband brings home a box of Hamburger Helper. I can’t even be in the room with it I’m so scared from that stuff. My husband is sad. His days of Hamburger Helper are over. I’m a good cook so he’s pretty much ok with not having Hamburger Helper but I think he secretly longs for it.
Since we’re eating better in our house, I found this recipe on EatBetterAmerica.com for "Healthified" Mexican Pasta Skillet which I knew my husband would love and devour. At first he was a little skeptical and made sure I was not making it with ground turkey (I have snuck ground turkey in many meals and he hasn’t noticed the difference but if he sees it, he won’t eat the leftovers the next day). This dish cooks up pretty quick and I questioned not pre-boiling the noodles but it all worked out. Anyway, he loved it and even devoured the leftovers (which he never does). He also told me to put it in my regular rotation of meals to make. Yay for being a good wife and finding a healthy alternative to Hamburger Helper I can actually stand to look at and eat without having flashbacks of that bathroom with the god awful pink toliet!
Here is the recipe! Now if I could only get my toddler to eat it!
Fast forward to being married 10 years later – my husband brings home a box of Hamburger Helper. I can’t even be in the room with it I’m so scared from that stuff. My husband is sad. His days of Hamburger Helper are over. I’m a good cook so he’s pretty much ok with not having Hamburger Helper but I think he secretly longs for it.
Since we’re eating better in our house, I found this recipe on EatBetterAmerica.com for "Healthified" Mexican Pasta Skillet which I knew my husband would love and devour. At first he was a little skeptical and made sure I was not making it with ground turkey (I have snuck ground turkey in many meals and he hasn’t noticed the difference but if he sees it, he won’t eat the leftovers the next day). This dish cooks up pretty quick and I questioned not pre-boiling the noodles but it all worked out. Anyway, he loved it and even devoured the leftovers (which he never does). He also told me to put it in my regular rotation of meals to make. Yay for being a good wife and finding a healthy alternative to Hamburger Helper I can actually stand to look at and eat without having flashbacks of that bathroom with the god awful pink toliet!
Here is the recipe! Now if I could only get my toddler to eat it!
[caption id="attachment_648" align="alignleft" width="275" caption="Mexican Pasta Skillet"]
[/caption]
"Healthified" Mexican Pasta Skillet
prep time:30 min |
start to finish:30 min |
makes:6 servings (about 1 1/3 cups each) |
| 1 | lb extra-lean (at least 93%) ground beef |
| 1 | jar (16 oz) Muir Glen® organic mild salsa |
| 1 | cup Muir Glen® organic tomato sauce (from 15-oz can) |
| 1 1/2 | cups water |
| 2 | cups uncooked regular or multigrain elbow macaroni |
| 1 | cup Green Giant® Niblets® frozen corn |
| 1/2 | cup shredded reduced-fat sharp Cheddar cheese (2 oz) |
| 1. | In 12-inch skillet, cook beef over medium-high heat 5 to 7 minutes, stirring occasionally, until thoroughly cooked; drain. |
| 2. | Stir in salsa, tomato sauce and water. Heat to boiling. Stir in macaroni and corn. Reduce heat; cover and simmer 12 to 15 minutes, stirring occasionally, until macaroni is tender. |
| 3. | Sprinkle with cheese. Cover; let stand 1 to 2 minutes or until cheese is melted. |
Sunday, January 10, 2010
Week 1 - The sodium chronicles
As you remember, I'm divorcing sodium to lower my blood pressure and lose some weight. This is something I can not fail at because if I do, I'll have to be chained to blood pressure meds and I really don't like spending my time in line at the Fred Meyer Pharmacy. Week one of logging my calories/sodium intake went well on Livestrong.com. My first day back at work after our vacation started with a weigh-in for our company's Biggest Loser challenge. I was happy that I was at least down 10 lbs from last year.
For the most part, I stayed on course with keeping my sodium in-take in control. One day I went over because I didn't realized that the low sodium burrito I was eating was actually two servings. Seriously, who splits a burrito? (OK, I have been known to split a mondo sized breakfast burrito but this burrito was not small). I did have pizza this week as well. I didn't eat half a pizza, just two slices. That's an improvement, for me.
The biggest hurdle has been getting my husband to realize that we have to plan meals out and can't just wing it. I'm getting a lot of "I don't want that" and I have to gently remind that well, I need to watch my sodium in-take in order to keep the blood pressure down. He then becomes supportive.
Today is my cheat day. I try hard NOT to go completely overboard. I started the day with a vanilla mocha from Thump and then some awesome cinnamon rolls that my friend Jen made. That was followed up by a mimosa. Did I mention that after that I went to Costco and indulged in a hot dog? The rest of the day will be relatively low on the sodium spectrum.
The other hurdle ... finding gourmet low sodium recipes. I love Everyday Food Magazine BUT they don't put the sodium content on their nutrition contents so I have to enter all the ingredients into a calculator and divide it by the servings to figure it out. I did send them an email and got back a lame response. So far, EatingWell.com and EatBetterAmerica.com and the South Beach Diet cookbook have become places for safe recipes. If you have any suggestions for places to find gourmet recipes that are low in sodium, I would love to know.
As for exercising, I think I need to visit a physical therapist. In July, while running the river trail, I twisted my ankle. I spent a month not running and walked instead. Since I'm back to running, I've developed some ankle pain. I am hoping that my new shoes will correct the problem but if it doesn't I hope I'm not sidelined again. I want to do a triathlon so I need to figure out what to do to keep running. I have developed this love of running and I don't want to abandon it. This week I've run/walked 11 miles. I need to change it up and I'm interested in trying water running and I do have to start spinning which I'm dreading.
Well, onto week 2.
For the most part, I stayed on course with keeping my sodium in-take in control. One day I went over because I didn't realized that the low sodium burrito I was eating was actually two servings. Seriously, who splits a burrito? (OK, I have been known to split a mondo sized breakfast burrito but this burrito was not small). I did have pizza this week as well. I didn't eat half a pizza, just two slices. That's an improvement, for me.
The biggest hurdle has been getting my husband to realize that we have to plan meals out and can't just wing it. I'm getting a lot of "I don't want that" and I have to gently remind that well, I need to watch my sodium in-take in order to keep the blood pressure down. He then becomes supportive.
Today is my cheat day. I try hard NOT to go completely overboard. I started the day with a vanilla mocha from Thump and then some awesome cinnamon rolls that my friend Jen made. That was followed up by a mimosa. Did I mention that after that I went to Costco and indulged in a hot dog? The rest of the day will be relatively low on the sodium spectrum.
The other hurdle ... finding gourmet low sodium recipes. I love Everyday Food Magazine BUT they don't put the sodium content on their nutrition contents so I have to enter all the ingredients into a calculator and divide it by the servings to figure it out. I did send them an email and got back a lame response. So far, EatingWell.com and EatBetterAmerica.com and the South Beach Diet cookbook have become places for safe recipes. If you have any suggestions for places to find gourmet recipes that are low in sodium, I would love to know.
As for exercising, I think I need to visit a physical therapist. In July, while running the river trail, I twisted my ankle. I spent a month not running and walked instead. Since I'm back to running, I've developed some ankle pain. I am hoping that my new shoes will correct the problem but if it doesn't I hope I'm not sidelined again. I want to do a triathlon so I need to figure out what to do to keep running. I have developed this love of running and I don't want to abandon it. This week I've run/walked 11 miles. I need to change it up and I'm interested in trying water running and I do have to start spinning which I'm dreading.
Well, onto week 2.
Friday, January 1, 2010
New year. New goals.
It's a new year. I think I've gained 10 lbs in the past week with all the out of control eating. I ate my final linzer cookie until next Christmas season. I've had an alcoholic beverage everyday since Christmas and I have not exercised. My husband and I were talking about goals last night for 2010. He is working on his freelance business since jobs are scarce at the moment. I NEED to cut down the salt to 2300 mg. Everyone keeps telling me, use Mrs. Dash. The salt shaker is not my problem -- I just need to eat less processed foods and more fruits, veggies, dairy and lean proteins. Along with cutting down on the sodium, I am also going to train for a triathlon in an attempt to do one in July. If I can run 3 miles, I am pretty sure by July I can do a triathlon. I'm calling it the tryathlon challenge. GULP. Wish me luck.
As a family, we need to be better about a few things with Lil B. Brushing teeth, reading, getting him with some play friends. The other thing is we need to start going to church. We keep talking about it but we're not doing it. We'll be exploring that avenue in the next couple of months.
So, in a nutshell, that's some of the goals for 2010. I'll check back and let you know how they're going.
As a family, we need to be better about a few things with Lil B. Brushing teeth, reading, getting him with some play friends. The other thing is we need to start going to church. We keep talking about it but we're not doing it. We'll be exploring that avenue in the next couple of months.
So, in a nutshell, that's some of the goals for 2010. I'll check back and let you know how they're going.
Labels:
Being a mom,
family,
goals,
I like food,
life,
Toddler life,
tryathlon
Wednesday, December 16, 2009
Divorcing salt
As I have mentioned before, I’ve had some struggles with my blood pressure lately. After trying several medications, it turns out that I have anxiety issues and white coat hypertension. I’m anxious lately due to the lack of a second income in our family (this is not my husband’s fault, there just isn’t anything out there). Still, my blood pressure when I monitor it at home is showing pre-hypertension numbers which is probably because I’m a tad bit on the heavy side. The only ways to lower it in this circumstance would be to cut my sodium intake down to 2300 mg, exercise and do yoga/breathing exercises.
So, I started researching lowering my sodium intake and started tracking my eating on mydailyplate.com. I was shocked to find out that my standby lunch staple, a Subway sandwich, contained at least 75% of my daily sodium intake. Yikes! I also noticed that a lot of recipes from Everydayfoodmag.com contained the calorie/fat information but not the sodium intake. I began to start studying labels big time. Nutella had a limited amount of sodium. A whole can of tomatoes – 500 mg of sodium. I found great websites with gourmet, full of flavor recipes and I pulled out my South Beach Diet cookbook. In order to lower my sodium, drastic changes were in store. I got a little depressed.
THEN I actually started watching my sodium last week. I started with eating a banana, orange and latte for breakfast. Lunch consisted of healthy leftovers or a low sodium lean cuisine . Snacks included an avocado/wasu crackers or granola type bar (though this week I discovered that my beloved Take 5 was only 180mg – ha! I can still have some sweets). The most important meal was dinner. I had to make dinner bearable for the toddler and husband as well as on the quick side. This week my husband has been pleasantly please by the new dishes we are trying. We even had broccoli mac and cheese and he lived as well as loved it.
I do allow myself one day to eat something off limits. I believe that allowing that can help me focus on the other times.
I must confess, I haven’t been to the gym in over two weeks. I told myself that after this week’s cold snap I would be back at it, trying to train for a triathlon (we should call that tryathlon) in July. And since I’m not a fan of yoga, I have looked into breathing exercises.
I do feel better since watching my sodium. Let’s see if it helps the waistline.
So, I started researching lowering my sodium intake and started tracking my eating on mydailyplate.com. I was shocked to find out that my standby lunch staple, a Subway sandwich, contained at least 75% of my daily sodium intake. Yikes! I also noticed that a lot of recipes from Everydayfoodmag.com contained the calorie/fat information but not the sodium intake. I began to start studying labels big time. Nutella had a limited amount of sodium. A whole can of tomatoes – 500 mg of sodium. I found great websites with gourmet, full of flavor recipes and I pulled out my South Beach Diet cookbook. In order to lower my sodium, drastic changes were in store. I got a little depressed.
THEN I actually started watching my sodium last week. I started with eating a banana, orange and latte for breakfast. Lunch consisted of healthy leftovers or a low sodium lean cuisine . Snacks included an avocado/wasu crackers or granola type bar (though this week I discovered that my beloved Take 5 was only 180mg – ha! I can still have some sweets). The most important meal was dinner. I had to make dinner bearable for the toddler and husband as well as on the quick side. This week my husband has been pleasantly please by the new dishes we are trying. We even had broccoli mac and cheese and he lived as well as loved it.
I do allow myself one day to eat something off limits. I believe that allowing that can help me focus on the other times.
I must confess, I haven’t been to the gym in over two weeks. I told myself that after this week’s cold snap I would be back at it, trying to train for a triathlon (we should call that tryathlon) in July. And since I’m not a fan of yoga, I have looked into breathing exercises.
I do feel better since watching my sodium. Let’s see if it helps the waistline.
Sunday, December 13, 2009
Easy pretzel turtles
[caption id="attachment_450" align="alignleft" width="300" caption="Pretzel turtles! YUM."]
[/caption]
One of my favorite things to do as a child around Christmas time was bake cookies with my mom. We would make gum drop cookies, easy fudge, pecan sandies and spritz cookies. Before she died, my mom bought me a spritz cookie maker but I tried and tried and I couldn't make those darn cookies! One of my traditions is making pecan sandies, though, I haven't made them yet this year. Maybe I will do that today?
I got invited to my first cookie exchange and I wanted to make something that was easy, yummy and fun to make. I went back and forth on what the heck to do and then Our Best Bites had a recipe for easy pretzel turtles. Salty and sweet! Yum! I had to prepare three dozen of something and I was done in 10 mins with cookie exchange cookie.
I think this will be a new tradition as the extras I had left over are now gone thanks to my husband, toddler and myself.
Enjoy!
Easy Pretzel Turtles
courtesy of Our Best Bites
small pretzels
Rolo candies - one bag has about 55 candies
Pecan halves - or optionally peanuts, cashews, and m&m's
Optional: almond bark or white chocolate for drizzling
This is easy as can be! Preheat your oven to 350 degrees. Place pretzels on a parchment lined baking sheet. I like to use parchment paper for easy handling, but you can also put them on foil, a silpat, or directly onto the cookie sheet.
Unwrap your Rolo candies and place one on top of each pretzel like a cute little hat.
Don't they look like they're just standing there waiting for an order? At least someone in my house stands at attention because heaven knows my children don't!
Place pan in the oven for 3-4 minutes. Any longer is probably too long. You just want the chocolate on the outside to look glossy and melty, but they should still hold their shape.
Remove pan from oven and take a pecan and gently press it right into the center of the chocolate candy.
This will be my next challenge as my husband loves egg nog.
One of my favorite things to do as a child around Christmas time was bake cookies with my mom. We would make gum drop cookies, easy fudge, pecan sandies and spritz cookies. Before she died, my mom bought me a spritz cookie maker but I tried and tried and I couldn't make those darn cookies! One of my traditions is making pecan sandies, though, I haven't made them yet this year. Maybe I will do that today?
I got invited to my first cookie exchange and I wanted to make something that was easy, yummy and fun to make. I went back and forth on what the heck to do and then Our Best Bites had a recipe for easy pretzel turtles. Salty and sweet! Yum! I had to prepare three dozen of something and I was done in 10 mins with cookie exchange cookie.
I think this will be a new tradition as the extras I had left over are now gone thanks to my husband, toddler and myself.
Enjoy!
Easy Pretzel Turtles
courtesy of Our Best Bites
small pretzels
Rolo candies - one bag has about 55 candies
Pecan halves - or optionally peanuts, cashews, and m&m's
Optional: almond bark or white chocolate for drizzling
This is easy as can be! Preheat your oven to 350 degrees. Place pretzels on a parchment lined baking sheet. I like to use parchment paper for easy handling, but you can also put them on foil, a silpat, or directly onto the cookie sheet.
Unwrap your Rolo candies and place one on top of each pretzel like a cute little hat.
Don't they look like they're just standing there waiting for an order? At least someone in my house stands at attention because heaven knows my children don't!
Place pan in the oven for 3-4 minutes. Any longer is probably too long. You just want the chocolate on the outside to look glossy and melty, but they should still hold their shape.
Remove pan from oven and take a pecan and gently press it right into the center of the chocolate candy.
This will be my next challenge as my husband loves egg nog.
Sunday, November 29, 2009
Gobble gobble
We had a lot of traditions growing up. Coconut pies and Grandma's for Thanksgiving. At Christmas, my brother Christopher said he loved the way we opened our gifts (from youngest to oldest, one at a time). For some reason, I always had the most gifts (my mom said this was because the stuff I wanted was always cheap). After the gifts, we'd head to Grandma's for food, presents and sometimes Midnight Mass. For Easter, my mom would make strawberry pie and my Grandma would make a ham. The holidays are about your family and since we have a little one, it was time to start traditions.
I made my first Thanksgiving family meal this year. I was quite nervous about it and I got a lot of crap for brining my turkey the weekend before and then de-boning my turkey but it was worth it. My sister-in-law, who is a vegetarian most of the time, said it was the best turkey she's eaten -- EVER. The cornbread stuff wasn't so good though. My husband was against the cornbread stuffing from the beginning. He said it was too sweet. I was the only one who would eat it so guess where it ended up -- the trash. I should have boxed it up and taken it to a homeless shelter. I thought it was good though.
My husband and I decided that we wanted to celebrate Thanksgiving with family. Since my mother-in-law works on the holidays, we invited my sister-in-law and her family over. She brought the vegetables and pies (yum!) and I worked on the rest. After our bellies were full of the best turkey dinner EVER they played Truth or Dare Jenga while I entertained the toddler.
I have to stay, this was the best Thanksgiving giving we've had since I moved to Bend. And I hope it becomes a tradition.
I made my first Thanksgiving family meal this year. I was quite nervous about it and I got a lot of crap for brining my turkey the weekend before and then de-boning my turkey but it was worth it. My sister-in-law, who is a vegetarian most of the time, said it was the best turkey she's eaten -- EVER. The cornbread stuff wasn't so good though. My husband was against the cornbread stuffing from the beginning. He said it was too sweet. I was the only one who would eat it so guess where it ended up -- the trash. I should have boxed it up and taken it to a homeless shelter. I thought it was good though.
My husband and I decided that we wanted to celebrate Thanksgiving with family. Since my mother-in-law works on the holidays, we invited my sister-in-law and her family over. She brought the vegetables and pies (yum!) and I worked on the rest. After our bellies were full of the best turkey dinner EVER they played Truth or Dare Jenga while I entertained the toddler.
I have to stay, this was the best Thanksgiving giving we've had since I moved to Bend. And I hope it becomes a tradition.
Labels:
18 months,
About my mom,
I like food,
marylu project,
nablopomo
Wednesday, November 11, 2009
It ain't Thanksgiving if you don't have turkey
I was going to make this glorious Thanksgiving feast when my friend told me she's not too into Thanksgiving food - she's gonna make tacos instead of come over. TACOS? Really? The only time I didn't eat Turkey on Thanksgiving was when we went to Disney World in 2003 and we decided to get Chinese. That took our guests from seven back down to the three of us (which means two with Lil B). I was a little relieved because that meant I could just roast a turkey the way my mom did -- turkey breast in the cockpot with salt, pepper and water for 8 hours (it falls right off the bone). Before I knew that my feast was down to three people, I had signed up at Allyson's Kitchen for a Thanksgiving Feast class so I could learn how to roast a turkey. I was dreading the class because the wind was out of my sails -- TACOS? Really? Humph. I'm glad I went. I learned something I was always afraid to do -- debone poultry.
[caption id="" align="alignleft" width="269" caption="Homemade Turkey dinner"]
[/caption]
Did you know that if you debone a turkey, it only takes 45 mins to one hour to roast at 425 degrees? Makes sense. Our instructor deboned a turkey and then had us debone half of a turkey (with his help and a partner), season it and double wrap in foil to roast in the oven. The foil captures the juice so you could put it in the gravy (one stick of butter, 1/4 cup of flour melted on low to make a rue that resembles peanut butter, throw in your stock and a splash of brandy -- it was yummy). I've always been afraid of making my own stock but I'm certain this is the year I will do it. Homemade stock seems to be a cake walk. We also made cornbread stuffing which I have never made before -- I always watched my grandma stuff her turkey with her Polish stuff recipe. I am a convert. We will have cornbread stuff this year. We also made green bean casserole with homemade fried onions on top (yum) and pecan sweet potato pie. Good thing I didn't eat dinner.
I'm making my feast even if it's just us. Thank you, Allyson's for inspiring me to cook awesome food.
Here is a simple cranberry sauce the chef told us to try. Mix a can of whole cranberries, a jar of orange marmalade, 1/4 cup of red wine and a dash of cinnamon. Simmer until warm. You'll never eat the canned jelly stuff again.
Enjoy!
[caption id="" align="alignleft" width="269" caption="Homemade Turkey dinner"]
Did you know that if you debone a turkey, it only takes 45 mins to one hour to roast at 425 degrees? Makes sense. Our instructor deboned a turkey and then had us debone half of a turkey (with his help and a partner), season it and double wrap in foil to roast in the oven. The foil captures the juice so you could put it in the gravy (one stick of butter, 1/4 cup of flour melted on low to make a rue that resembles peanut butter, throw in your stock and a splash of brandy -- it was yummy). I've always been afraid of making my own stock but I'm certain this is the year I will do it. Homemade stock seems to be a cake walk. We also made cornbread stuffing which I have never made before -- I always watched my grandma stuff her turkey with her Polish stuff recipe. I am a convert. We will have cornbread stuff this year. We also made green bean casserole with homemade fried onions on top (yum) and pecan sweet potato pie. Good thing I didn't eat dinner.
I'm making my feast even if it's just us. Thank you, Allyson's for inspiring me to cook awesome food.
Here is a simple cranberry sauce the chef told us to try. Mix a can of whole cranberries, a jar of orange marmalade, 1/4 cup of red wine and a dash of cinnamon. Simmer until warm. You'll never eat the canned jelly stuff again.
Enjoy!
Labels:
About my mom,
food porn,
I like food,
marylu project,
nablopomo,
Posts
Thursday, October 29, 2009
I like big beets (and fennel) and can not lie
Since moving to Bend, I've tried to eat organic, healthier meals. When I used to think about organic, I thought expensive. In the midwest, organic meant shopping at Whole Paycheck and spending more to get healthier more nutritious options. Yes, I was naive. I sure thought those graham pretzel cookies were good for you. Now that I look back at it, I was living in the midwest, around a bounty of fresh produce with a longer growing season. That is one perk I would say about living in the midwest -- you can grow more vegetables.
As a child, my mom had a garden and we'd have fresh tomatoes, peppers, beans and squash. Of course, my brothers and I all turned up our noses. My mom used to roast homegrown acorn squash and I'd still turn my nose. I look back feeling pretty stupid. We had peach and apple trees along with strawberries too -- jam all winter, apple pies - I can smell the memories. I remember at a young age my mom giving me a pail to pick strawberries and I'd eat one strawberry and then put one in the bucket and then repeated until one day I picked up a snake. I never went into the strawberry patch again.
Where was I? Oh yes, now that I have a child, I feel like I need to make home cooked meals. I plan them out in great detail and shop each week for our fresh meals. We joined a CSA which helped dictate what our meals would be week. Even though we split it with Kate, we still could eat salad each night. Then we started getting items that I've never tried in my life -- beets, kale, chard, different squashes, fennel, leeks. Eek! What do I do? I can't let the $11 a week I'm spending go down the tub. Must eat things I've turned my nose up to before.
First up were beets. Instead of flipping through the internet, I flipped through my cookbooks. Lo and behold, my good old standby cookbook came through with a roasted beet salad recipe with goat cheese and red wine vinaigrette dressing. It was to die for YUMMY. I've roasted my beets each time and tossed them into my salads along with some candied nuts from TJs.
Fennel was the next victim in my pursuit to expand my culinary adventures with vegetables. Fennel smells like licorice
[caption id="attachment_56" align="alignright" width="180" caption="Chicken and fennel are a natural match together"]
[/caption]
I hate black licorice but I still went ahead and cooked up with chicken and carrots. YUM. My husband and I were fighting for the seconds. Next time I made pork chops, tomatoes and fennel. We discovered that Lil B was a fan and kept piling more on his plate. It takes an act of congress to get him to eat any vegetable unless it's a spinach and artichoke veggie nugget. Next week I plan on buying fennel in the store and roasting a whole chicken with fennel! You see, I'm branching out.
This week when my husband came home with the CSA and he exclaimed we were having brussel sprouts for dinner. I did my icky face but then decided that I'd give them a shot. Twenty minutes later steamed with a tiny bit of butter and I was sold. Even Lil B ate them up.
I'm also a squash convert. Acorn squash. Spaghetti squash. Butternut squash. Delicata squash -- I could go on and on. Squash lasagna is on the meal plan for next week along with roasted acorn squash wedges. My mother would be SO proud.
I will admit some of my CSA went to waste. We always had way too much lettuce, spinach and tried our best to eat a salad each day. I also discovered that I don't like kale at all. I have a bunch of fresh kale going to my co-worker tomorrow. When we do our CSA again, I will make sure the kale goes to a good home. I'm sure someone out there will take it off my hands.
I hope I'm teaching my toddler the joys of vegetables. I can't believe it took me 34 years to develop a love affair with vegetables.
As a child, my mom had a garden and we'd have fresh tomatoes, peppers, beans and squash. Of course, my brothers and I all turned up our noses. My mom used to roast homegrown acorn squash and I'd still turn my nose. I look back feeling pretty stupid. We had peach and apple trees along with strawberries too -- jam all winter, apple pies - I can smell the memories. I remember at a young age my mom giving me a pail to pick strawberries and I'd eat one strawberry and then put one in the bucket and then repeated until one day I picked up a snake. I never went into the strawberry patch again.
Where was I? Oh yes, now that I have a child, I feel like I need to make home cooked meals. I plan them out in great detail and shop each week for our fresh meals. We joined a CSA which helped dictate what our meals would be week. Even though we split it with Kate, we still could eat salad each night. Then we started getting items that I've never tried in my life -- beets, kale, chard, different squashes, fennel, leeks. Eek! What do I do? I can't let the $11 a week I'm spending go down the tub. Must eat things I've turned my nose up to before.
First up were beets. Instead of flipping through the internet, I flipped through my cookbooks. Lo and behold, my good old standby cookbook came through with a roasted beet salad recipe with goat cheese and red wine vinaigrette dressing. It was to die for YUMMY. I've roasted my beets each time and tossed them into my salads along with some candied nuts from TJs.
Fennel was the next victim in my pursuit to expand my culinary adventures with vegetables. Fennel smells like licorice
[caption id="attachment_56" align="alignright" width="180" caption="Chicken and fennel are a natural match together"]
I hate black licorice but I still went ahead and cooked up with chicken and carrots. YUM. My husband and I were fighting for the seconds. Next time I made pork chops, tomatoes and fennel. We discovered that Lil B was a fan and kept piling more on his plate. It takes an act of congress to get him to eat any vegetable unless it's a spinach and artichoke veggie nugget. Next week I plan on buying fennel in the store and roasting a whole chicken with fennel! You see, I'm branching out.
This week when my husband came home with the CSA and he exclaimed we were having brussel sprouts for dinner. I did my icky face but then decided that I'd give them a shot. Twenty minutes later steamed with a tiny bit of butter and I was sold. Even Lil B ate them up.
I'm also a squash convert. Acorn squash. Spaghetti squash. Butternut squash. Delicata squash -- I could go on and on. Squash lasagna is on the meal plan for next week along with roasted acorn squash wedges. My mother would be SO proud.
I will admit some of my CSA went to waste. We always had way too much lettuce, spinach and tried our best to eat a salad each day. I also discovered that I don't like kale at all. I have a bunch of fresh kale going to my co-worker tomorrow. When we do our CSA again, I will make sure the kale goes to a good home. I'm sure someone out there will take it off my hands.
I hope I'm teaching my toddler the joys of vegetables. I can't believe it took me 34 years to develop a love affair with vegetables.
Wednesday, October 28, 2009
Fresh apples ... yummmm
I have to start thinking about what I'm going to bake in my company's employee bake-off challenge. Each week there will be a different category ... pies, brownies, cookies - I think. Anyone have a killer recipe they want to share? One of my co-workers shared that she loved this recipe for zucchini cake I made this summer. Another really liked this peach pie. I'm still waiting on Jen's killer brownie recipe she says I'm sure to win with.
This week five liberty apples from LaMancha Ranch in Sweet Home, OR greeted me in our CSA box from Groundwork Organics. Five apples is the perfect amount for a pie or crisp and since I have recently fell in love with Smitten Kitchen's Breakfast Apple Crisp dish, I decided that's what we were having for breakfast in the morning.
Breakfast Apple Crisp
Courtesy of Smitten Kitchen
3 pounds* of whatever apples, or mix of apples, you like to bake with, peeled, cored and cut into medium chunks
2 tablespoons lemon juice
3 tablespoons sugar
2 tablespoons cornstarch
1 teaspoon cinnamon
Salt
1 stick (8 tablespoons or 4 ounces) unsalted butter
1/4 cup honey
1/2 cup flour
2 cups oats
1/2 cup sliced almonds
1/2 shredded coconut (sweetened or unsweetened, as you wish; I used unsweetened)
Preheat oven to 400°F. Mix apple chunks with lemon juice, sugar, cornstarch, cinnamon and pinch of salt in a 9×13-inch baking dish until apples are evenly coated. In a medium saucepan, melt the butter with the honey. Stir in the flour, oats, almonds, coconut and another pinch of salt until clumps form. Sprinkle evenly over the apple mixture and bake in the oven for about 45 to 55 minutes, or until the apples are softened and bubbly. Should the granola brown before you wish it to, cover the baking dish carefully with foil for all but the last few minutes of baking time, when removing the foil will help the granola recrisp. Cool to room temperature and then stash in the fridge to eat with your morning yogurt.
ENJOY!
This week five liberty apples from LaMancha Ranch in Sweet Home, OR greeted me in our CSA box from Groundwork Organics. Five apples is the perfect amount for a pie or crisp and since I have recently fell in love with Smitten Kitchen's Breakfast Apple Crisp dish, I decided that's what we were having for breakfast in the morning.
Breakfast Apple Crisp
Courtesy of Smitten Kitchen
3 pounds* of whatever apples, or mix of apples, you like to bake with, peeled, cored and cut into medium chunks
2 tablespoons lemon juice
3 tablespoons sugar
2 tablespoons cornstarch
1 teaspoon cinnamon
Salt
1 stick (8 tablespoons or 4 ounces) unsalted butter
1/4 cup honey
1/2 cup flour
2 cups oats
1/2 cup sliced almonds
1/2 shredded coconut (sweetened or unsweetened, as you wish; I used unsweetened)
Preheat oven to 400°F. Mix apple chunks with lemon juice, sugar, cornstarch, cinnamon and pinch of salt in a 9×13-inch baking dish until apples are evenly coated. In a medium saucepan, melt the butter with the honey. Stir in the flour, oats, almonds, coconut and another pinch of salt until clumps form. Sprinkle evenly over the apple mixture and bake in the oven for about 45 to 55 minutes, or until the apples are softened and bubbly. Should the granola brown before you wish it to, cover the baking dish carefully with foil for all but the last few minutes of baking time, when removing the foil will help the granola recrisp. Cool to room temperature and then stash in the fridge to eat with your morning yogurt.
ENJOY!
Monday, October 26, 2009
The resident chicken hater
My husband, for some reason, doesn't like chicken. I think it might have something to do with getting food poisoning from a chicken dish (not made by me, of course). Getting him to be ok with making chicken dishes has taken some time over the past six years but recently, I made one that he exclaimed "THIS IS THE BEST CHICKEN DISH EVER." I whole heartedly give Martha Stewart props for this tasty chicken dish which is super easy to make. It also includes items from my CSA as well.
Ingredients
Serves 4
1/4 cup all-purpose flour
Coarse salt and ground pepper
4 fresh whole sage leaves, plus 4 minced leaves
4 (6 to 8 ounces each) chicken cutlets
4 slices (3 ounces) thinly sliced prosciutto
4 teaspoons olive oil
3/4 cup dry white wine
1/3 cup reduced-sodium canned chicken broth
1 tablespoon cold butter
Directions
In a shallow bowl, stir together flour, 1/2 teaspoon salt, and 1/4 teaspoon pepper. Set aside.
Lay 1 sage leaf lengthwise on each cutlet, then wrap a prosciutto slice around middle of each cutlet, encasing sage. Flatten with the palm of your hand to help prosciutto adhere to the chicken. Dredge cutlets in seasoned flour; tap off excess.
In a large nonstick skillet, heat 2 teaspoons oil over medium-high heat. Cook 2 cutlets until golden brown and cooked through, 3 to 4 minutes per side. Remove cutlets, and keep warm. Repeat with remaining 2 teaspoons oil and 2 cutlets.
Add wine and broth to skillet; cook over high heat until reduced by three-quarters, about 2 minutes. Remove from heat; let cool 1 minute. Add butter and minced sage; stir until butter is melted, about 30 seconds. Spoon sauce onto plates; top with cutlets. Serve immediately.
Chicken with Prosciutto and Sage
Ingredients Serves 4
1/4 cup all-purpose flour
Coarse salt and ground pepper
4 fresh whole sage leaves, plus 4 minced leaves
4 (6 to 8 ounces each) chicken cutlets
4 slices (3 ounces) thinly sliced prosciutto
4 teaspoons olive oil
3/4 cup dry white wine
1/3 cup reduced-sodium canned chicken broth
1 tablespoon cold butter
Directions
In a shallow bowl, stir together flour, 1/2 teaspoon salt, and 1/4 teaspoon pepper. Set aside.
Lay 1 sage leaf lengthwise on each cutlet, then wrap a prosciutto slice around middle of each cutlet, encasing sage. Flatten with the palm of your hand to help prosciutto adhere to the chicken. Dredge cutlets in seasoned flour; tap off excess.
In a large nonstick skillet, heat 2 teaspoons oil over medium-high heat. Cook 2 cutlets until golden brown and cooked through, 3 to 4 minutes per side. Remove cutlets, and keep warm. Repeat with remaining 2 teaspoons oil and 2 cutlets.
Add wine and broth to skillet; cook over high heat until reduced by three-quarters, about 2 minutes. Remove from heat; let cool 1 minute. Add butter and minced sage; stir until butter is melted, about 30 seconds. Spoon sauce onto plates; top with cutlets. Serve immediately.
Subscribe to:
Posts (Atom)